How to Finally Get Rid of a Leaky Faucet: A Comprehensive Guide from Texas
In everyday life, small household annoyances frequently pop up and demand our attention. One of the most common is a leaky faucet. Many homeowners (especially in Texas) underestimate the seriousness of this seemingly simple issue. However, in a region prone to high temperatures and periodic droughts, even a few drops of water lost every minute can lead to significant expenses and unnecessary strain on the environment. In this guide, I—an experienced electrician who has often dealt with various household systems—will explain how to fix a leaky faucet on your own and why it is so important to address this issue promptly. Although electricity and plumbing are separate fields, it’s not unusual to tackle water-related tasks to keep all of a home’s systems working in harmony.
Why Prompt Repairs Matter
Have you ever wondered how much water goes to waste while you postpone fixing that dripping faucet “for later”? According to the U.S. Environmental Protection Agency (EPA), even a small, steady drip can waste more than 3,000 gallons of water per year. In Texas, where each gallon can be precious during dry spells, this is particularly relevant. Additionally, continuous moisture on plumbing fixtures can lead to corrosion and other damage over time, resulting in even more expensive repairs. Not to mention the irritating sound of dripping water that can disrupt your peace and quiet.
In short, fixing a leaky faucet is more than just addressing a local household inconvenience. It’s an investment in future savings and in the environmental well-being of your region. The sooner you handle the repair, the less money you’ll spend on water bills, and the lower your risk of substantial wear on your plumbing components.
Why Faucets Start Leaking
Understanding the main causes of faucet leaks can help you decide on the best repair strategy and take preventive measures. Below are some of the most common culprits behind that troublesome drip.
Main Faucet Types and Their Specifics
-
Single-handle faucets
These use a cartridge to regulate water flow and temperature. Leaks often occur due to cartridge wear or deterioration of internal seals. -
Compression faucets
Common in older homes, they have separate handles for hot and cold water. They tend to develop leaks when their rubber washers (seals) or O-rings wear out. -
Cartridge faucets
Visually similar to single-handle faucets, yet they use a slightly different mechanism. The cartridge can become less effective over time, resulting in leaks. -
Ball faucets
Feature a metal or plastic ball that controls both pressure and temperature. They often leak when their seals, O-rings, or the ball assembly itself wears down or corrodes. -
Ceramic-disk faucets
Known for durability, they can still leak if mineral deposits accumulate or if the ceramic disks become damaged.
Factors Behind Faucet Leaks
- Worn-out washers or O-rings due to prolonged use
- Damaged valve seat (the area where the faucet stem or cartridge fits), often caused by corrosion or mineral buildup
- Incorrect installation, such as overtightening or using poor-quality parts
- Mineral deposits, which can develop more quickly in the hard water areas of Texas
- Loose internal parts that come from frequent temperature changes or fluctuations in water pressure
Sometimes, even a brand-new faucet can drip if it was installed incorrectly or came with subpar components. If you suspect a deeper issue with your faucet—say, you’re not sure about its type or discover unusual internal wear—consider reaching out to a professional plumber in your area. They can help identify the underlying cause and offer the best solution.
Preparing for the Repair
Even if it seems as simple as “change the washer,” any serious household repair calls for proper planning.
Tools and Materials
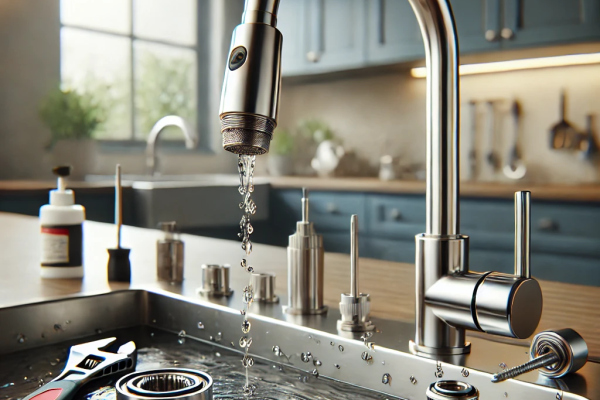
- Adjustable wrench or a set of wrenches in various sizes, for tightening and loosening nuts and fittings
- Screwdriver with both flathead and Phillips tips
- New seals, washers, or cartridges, depending on your faucet type
- Plumber’s grease, a specialized lubricant to protect rubber parts and improve seal integrity
- White vinegar, a handy all-purpose solution for removing mineral scale
- Rags or towels to wipe up water and prevent small parts from rolling away
- Flashlight if the work area under the sink is dimly lit
Safety Measures
- Shut off the water supply — turn off the shut-off valves under the sink, or shut off the main water valve if none are installed locally
- Cover the drain — use a plug or place a rag over the drain to avoid losing small screws or washers
- Take photos of each stage as you disassemble the faucet, so you’ll know the correct order of reassembly later
Step-by-Step Instructions for Fixing a Leaky Faucet
Disassembly
- Remove decorative caps, if present, on the faucet handles or lever
- Take off the handle — this might require loosening a set screw
- Loosen the retaining nut or detach any clip or pin to access the cartridge or stem assembly
- Carefully pull out the stem, cartridge, or ball (depending on faucet type), ensuring you don’t damage any surrounding components
Take your time during disassembly. If you accidentally bend or lose a small part, replacing it can be as expensive as buying a brand-new faucet.
Identifying and Replacing Worn Parts
- Check the condition of O-rings and washers. If they look cracked, discolored, or have lost elasticity, replace them
- Inspect the valve seat for deep corrosion or pitting. If the damage is severe, it may need resurfacing or a complete replacement
- Look over the cartridge — any cracks, chips, or scratches suggest the need for a new one
- Remove mineral deposits with white vinegar. In many parts of Texas, high water hardness leads to deposits that can interfere with a proper seal
After cleaning, put in the new seals and lubricate them with plumber’s grease to extend their lifespan and improve the watertight fit. If you discover cracks in the faucet body or other concerning damage, it’s wise to consult a plumbing professional. They can quickly assess the situation and recommend the best solution for the local water conditions.
Reassembly and Final Check
- Reassemble the faucet in reverse order, referencing your photos to ensure proper positioning
- Tighten all nuts carefully but avoid overtightening; too much force can damage threads and seals
- Turn the water supply back on and let the water run for about 20–30 seconds
- Check for leaks around the faucet and handles. If you notice any drips, gently tighten the fittings or reevaluate the placement of washers and O-rings
Don’t just test the faucet by turning it on and off once. Make sure it holds up under various conditions—for example, while other water-consuming appliances like a washing machine are running. In large Texas homes, multiple appliances can be in use simultaneously, affecting water pressure.
Preventing Future Leaks
As an electrician who often encounters plumbing elements in various jobs, I know that proactive maintenance is a more cost-effective strategy than reacting to an emergency. There are several steps you can take to keep your faucets from dripping.
Regular Maintenance and Inspection
- Clean the aerators every few months to prevent clogs, which reduce water pressure and stress faucet components
- Avoid overtightening the faucet handles when turning the water off, as this can warp seals
- Watch for warning signs — if you notice sudden changes in water pressure or discolored water, you may need to check the pipes and filters to avoid bigger problems
When to Call a Professional
While most leaks are DIY-friendly, certain scenarios call for specialized attention:
- The faucet still leaks even after you’ve replaced all obvious worn parts
- Complex faucet designs or custom fixtures that require specific tools and expertise
- Severe corrosion on parts or the faucet body
- Hidden leaks, where water seeps behind walls or under the sink, potentially causing extensive damage
In Texas, especially in metropolitan areas, it’s relatively easy to find qualified plumbers who can get the job done quickly. They often have access to original parts, understand local water conditions, and can guarantee their work, providing peace of mind if complications arise.
Frequently Asked Questions (FAQ)
How do I measure the severity of a leak?
Sometimes a faucet drip can be so subtle that you barely notice it, yet a substantial amount of water might be lost in a day. To measure it, place a container under the faucet for 10–15 minutes and see how many milliliters (or ounces) have accumulated. Then calculate the daily or monthly total. You might be shocked at the volume that’s wasted by a seemingly insignificant leak.
Which faucets are most prone to leaks?
- Compression faucets — they rely on rubber washers, which wear out relatively quickly
- Ball faucets — when the ball assembly or seals are corroded, they can start dripping
- Ceramic-disk faucets — these are quite durable, but if the ceramic disks get cracked, repairs can be costly
If you’re thinking about replacing your faucet, consider not only looks and price but also the quality of materials and suitability for your local water conditions. Seeking professional advice can help you pick the best model and ensure it’s installed correctly, saving you from another leak just months later.
Conclusion and Final Thoughts
A leaky faucet is more than just a small domestic annoyance. In a hot, sometimes drought-prone state like Texas—where water can be a strategic resource—every drop has real value. Fixing a drip doesn’t just spare you the maddening “drip-drip” sound; it also conserves water, cuts down on bills, and reduces future headaches.
Taking care of your plumbing today can ward off expensive repairs tomorrow. From my perspective as a professional electrician—who often works alongside other trades—tackling maintenance before trouble arises is the smartest approach to ensuring your home systems last longer. A regular inspection schedule, quick part replacements, and basic preventative measures all cost significantly less than urgent plumbing interventions.
If you’ve already attempted a repair but can’t seem to solve the problem, don’t lose hope. Sometimes even the best do-it-yourself tutorial overlooks hidden details that only an experienced eye can catch. In such cases, contacting a reputable plumber in Texas is recommended. Skilled specialists can quickly diagnose any underlying issues, such as hidden corrosion, incorrect installation, or unusual water pressure changes, and propose the most effective solution.
Remember: water is not only a budget concern—it’s also a community resource. Conserving water in Texas benefits everyone, now and in the future. Eliminate those leaks, safeguard your household finances, and ensure peace of mind by maintaining your faucets properly. After all, fixing a faucet can be your simple yet impactful contribution to preserving resources and creating a brighter future for the region.
A Handy Tip: Don’t skip regular check-ups. Inspecting pipes, seals, and faucet components every few months helps you catch small problems before they turn into costly issues.
Practical Advice: Keep a set of common replacement parts and basic tools on hand. This preparedness can save you from having to make an emergency trip to the store (which might be closed) when a leak surprises you at the worst possible time.
Hopefully, this comprehensive guide will help you effectively deal with a leaky faucet and avoid potential mishaps down the line. Take care of your water supply, your budget, and your peace of mind by giving your home’s plumbing the attention it deserves!


